
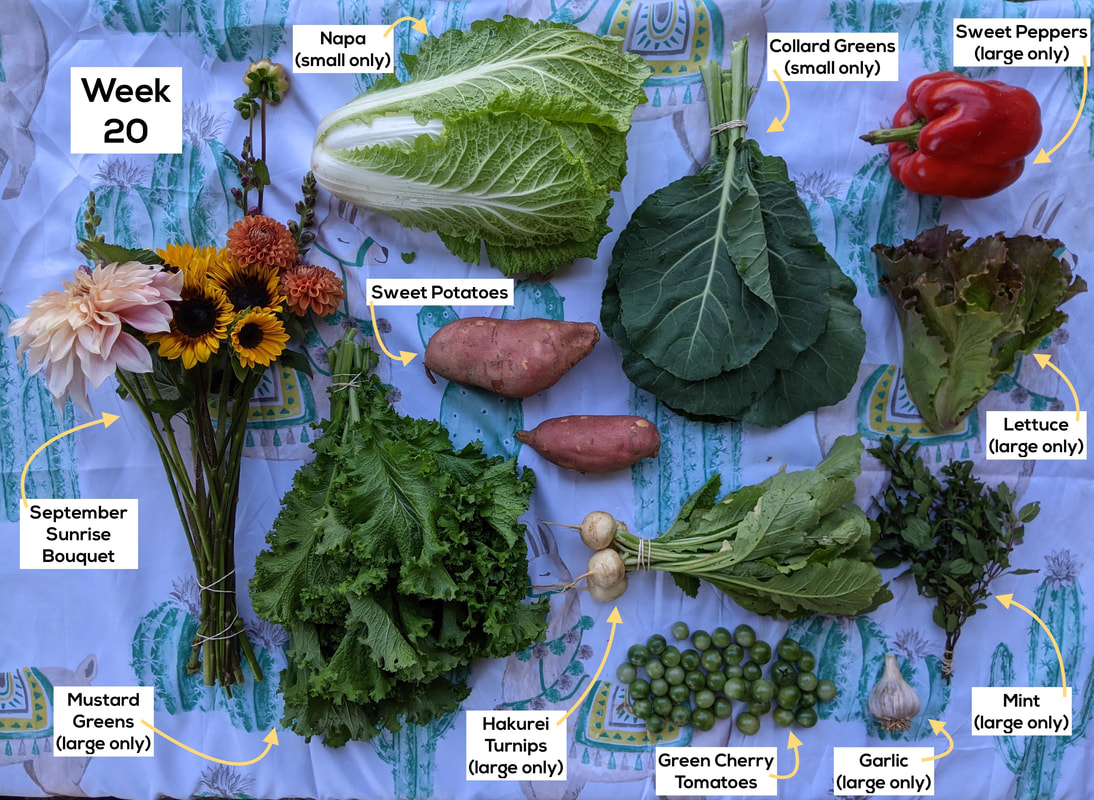
 Garlic Baby Bok Choy Stir Fry
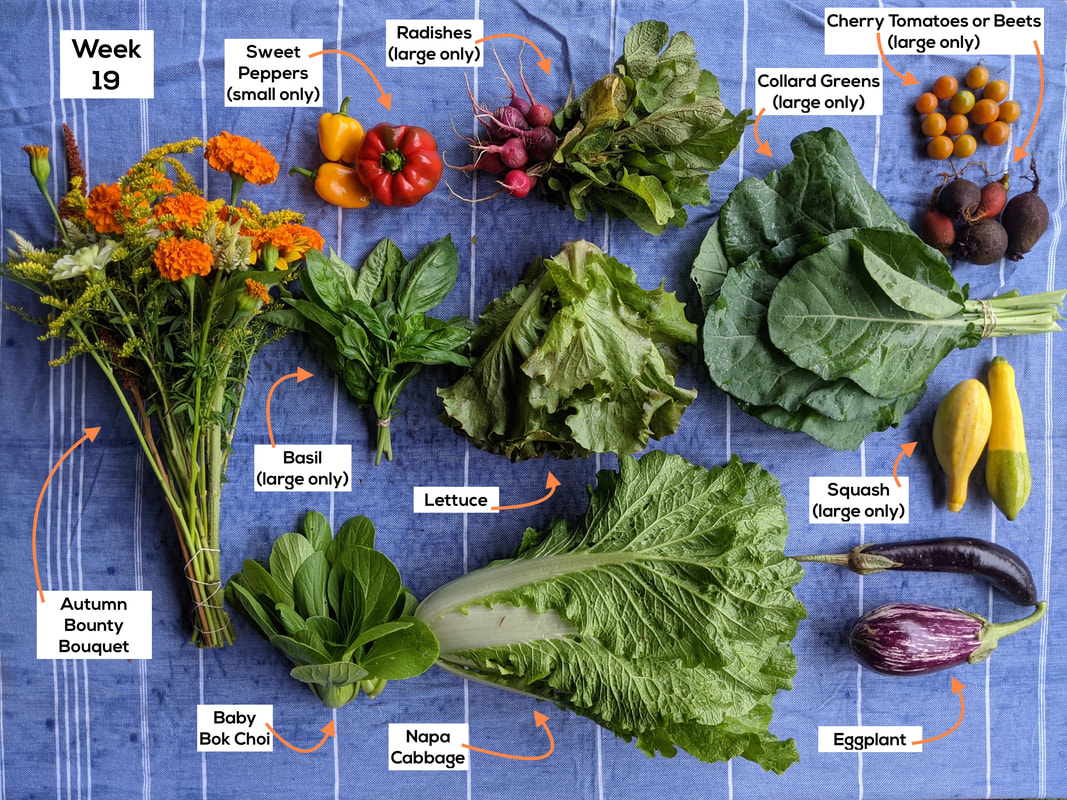
https://thewoksoflife.com/garlic-baby-bok-choy/ Ingredients: 1 pound baby bok choy (450g) 2 tablespoons oil 5 cloves garlic (minced) salt and white pepper (to taste) 1/8 teaspoon sugar Directions: Trim the bottoms off of each bundle of bok choy, and split them in half or quarters. Just make sure all of the pieces are relatively uniform so they cook evenly. You can leave them whole if they’re very small and tender. Wash thoroughly with cold water two to three times. These days, we’re never too cautious about making sure all of the dirt and pesticides are rinsed away. The best method is to use a large basin or sink to rinse and swirl around the vegetables letting them soak for a few minutes before draining and washing again. Shake off the excess water after the final rinse and transfer to a colander to drain. It is important to drain the vegetables well since these veggies will release quite a bit of water during the cooking process. Heat the wok over high heat until smoking, and add 2 tablespoons oil. Swirl around the oil so the wok is coated. Add all of the garlic and immediately add the bok choy. Move quickly to stir and sauté the greens in the oil and garlic. Stir quickly so you don’t burn the garlic! Use a folding motion to turn the vegetables or use tongs if that is easier. Once the vegetables begin to wilt, about 30 seconds, add salt, pepper, and sugar. How long you cook them from here is all personal preference. Judy likes to cook them a bit longer for a softer texture while I like them a little bit more crisp. Plate and serve immediately. Baba Ganoush! https://www.seriouseats.com/the-best-baba-ganoush-recipe Ingredients: 3 medium Italian eggplants (about 2 pounds/900g total), pricked all over with a fork 2 tablespoons (30 ml) lemon juice from 1 lemon, plus more as desired 3 medium cloves garlic, minced 3 tablespoons (45 ml) tahini 1/3 cup (80 ml) extra-virgin olive oil, plus more for serving 1/4 cup chopped fresh parsley leaves 1/2 teaspoon (1.4 grams) kosher salt; for table salt, use about half as much by volume or the same by weight Directions: If Using a Grill (recommended): Preheat a gas or charcoal grill to medium heat and place eggplants directly over heat source. Cook, turning occasionally with tongs, until eggplants are completely tender and well charred on all sides, 30 to 40 minutes. Wrap with foil and let rest 15 minutes. Continue to step 3. If Using the Broiler: Adjust rack to 6 inches below broiler element and preheat broiler to high. Place eggplants on a foil-lined rimmed baking sheet and prick all over with a fork. Broil, turning occasionally, until charred on all sides and completely tender, about 30 minutes (timing may vary depending on broiler strength). Eggplants should be very, very tender when cooked; if eggplant is not fully tender once skin is charred all over, switch oven to 425°F and roast until fully tender (a toothpick or skewer inserted near stem and bottom ends should not meet any resistance). Remove from oven and gather up foil, crimping it around eggplants to form a sealed package. Let eggplants rest for 15 minutes. Open foil package. Working with one eggplant at a time, use a sharp paring knife to slit each eggplant open lengthwise. Carefully scoop out soft flesh with a large spoon and transfer to a fine-mesh strainer set in a large bowl. Once all eggplant is scooped, pick out any stray bits of skin and blackened flesh and discard. Transfer eggplant to a salad spinner, distributing it evenly around the perimeter. Spin gently until all excess moisture is extracted. Discard all drippings, wipe out large bowl, and return eggplant to bowl. Add lemon juice and garlic to eggplant and stir vigorously with a fork until eggplant breaks down into a rough paste, about 1 1/2 minutes. Stirring constantly and vigorously, add tahini, followed by the olive oil in a thin, steady stream. The mixture should become pale and creamy. Stir in parsley and season to taste with salt, plus more lemon juice if desired. Transfer to a serving bowl, drizzle with olive oil, and serve with warm pita bread or vegetables for dipping. 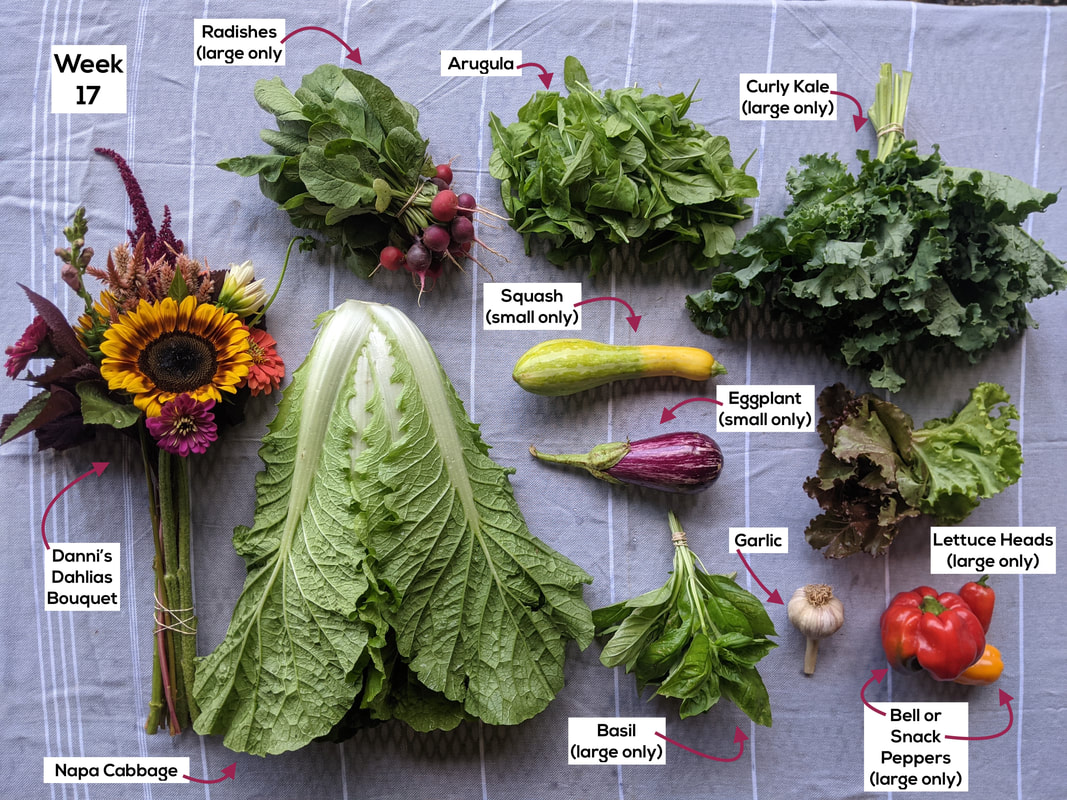 Sichuan Napa Cabbage Stir Fry
https://thewoksoflife.com/hot-sour-cabbage-stir-fry/ Ingredients: For the sauce: 4 teaspoons light soy sauce 1 tablespoon Chinese black vinegar 2 teaspoons sugar 1 tablespoon oyster sauce For the rest of the dish: 1/2 tablespoon cornstarch 1 tablespoon water 2 tablespoons canola oil (or vegetable oil) 4 cloves garlic (smashed and chopped) 3-6 dried red chilies (deseeded and chopped) 1 scallion (chopped) 1 pound napa cabbage (450g, bai cai, stems only, sliced at an angle) Salt (to taste) Directions: Start by making the sauce by mixing together all the sauce ingredients until the sugar is dissolved. In another small bowl, dissolve the cornstarch in 1 tablespoon water to make a slurry. Set aside. (Remember, cornstarch settles quickly, so remember to stir the slurry again before adding it to the dish later). Heat the oil in a wok over medium low heat. Add the garlic, chilies, and scallions, and cook for 1 minute. Add the cabbage and turn up the heat to high. Stir-fry for 2 minutes. Now add the prepared sauce and cook for another minute. Season with salt to taste (though you may not need it, as the soy sauce is pretty salty). Stir in the cornstarch slurry and stir-fry for one more minute, until the sauce is thickened. Serve with steamed rice. Kimchi Adapted from Korean Bapsang https://www.koreanbapsang.com/mak-kimchi-simple-kimchi/ Ingredients: 1 large napa cabbage 3/4 cups coarse sea salt less if using finer salt 3 cups water 1 Korean radish mu (about 3/4 pounds)* 2 teaspoons coarse sea salt 2-3 scallions roughly chopped 1/2 cup gochugaru Korean red chili pepper flakes* 2 tablespoons saeujeot salted shrimp, finely minced* 2 tablespoons myulchiaekjeot fish sauce* 2 tablespoons minced garlic 1 teaspoon finely grated ginger 2 teaspoons sugar Directions: Cut the cabbage head into quarters and remove the core from each quarter. Cut each quarter crosswise into bite sizes (about 1-1/2-inches). Place the cabbage pieces in a large bowl(s). In a smaller bowl, dissolve 3/4 cups of salt in 3 cups of water. Pour over the cabbage. Toss well to wet the cabbage pieces evenly with the salt water. Let stand until the white parts are bendable, about 1 hour, turning the cabbage pieces over occasionally. Cut the radish into bite sizes (about 1-1/2-inch square, about 1/4-inch thick). Sprinkle with 2 teaspoons of salt. Toss well. Let it sit for about 30 minutes. Drain. Do not wash. Mix the chili pepper flakes with the remaining seasoning ingredients along with 1 cup of water. Rinse the salted cabbage three times and drain to remove excess water. In a large bowl, add the radish, scallions and seasoning to the salted cabbage. Using a kitchen glove, mix everything well by hand until the cabbage pieces are well coated with the seasoning mix. Place the kimchi in an airtight container(s) or a jar(s). Rinse the bowl with 1/4 cup of water by swirling around, and pour over the kimchi. Leave the kimchi out at room temperature for half a day to a day, depending on how quickly you want your kimchi to ferment. Then, refrigerate. Notes: You can dress this kimchi up by adding other ingredients like Korean pear, oysters, garlic chives, etc. If you like lighter tasting kimchi, simply reduce the amounts of red chili pepper flakes, salted shrimp, fish sauce, and/or garlic. If you don't have salted shrimp, just add more fish sauce (and salt if needed) to achieve the desired salt level. *These ingredients can be found in the Asian aisle at large grocery stores, or in specific Asian grocery stores. Mu radish is a large cylindrical radish and can be substituted with daikon radish. To make vegetarian, omit fish and shrimp and adjust salt to taste with soy sauce or more salt. 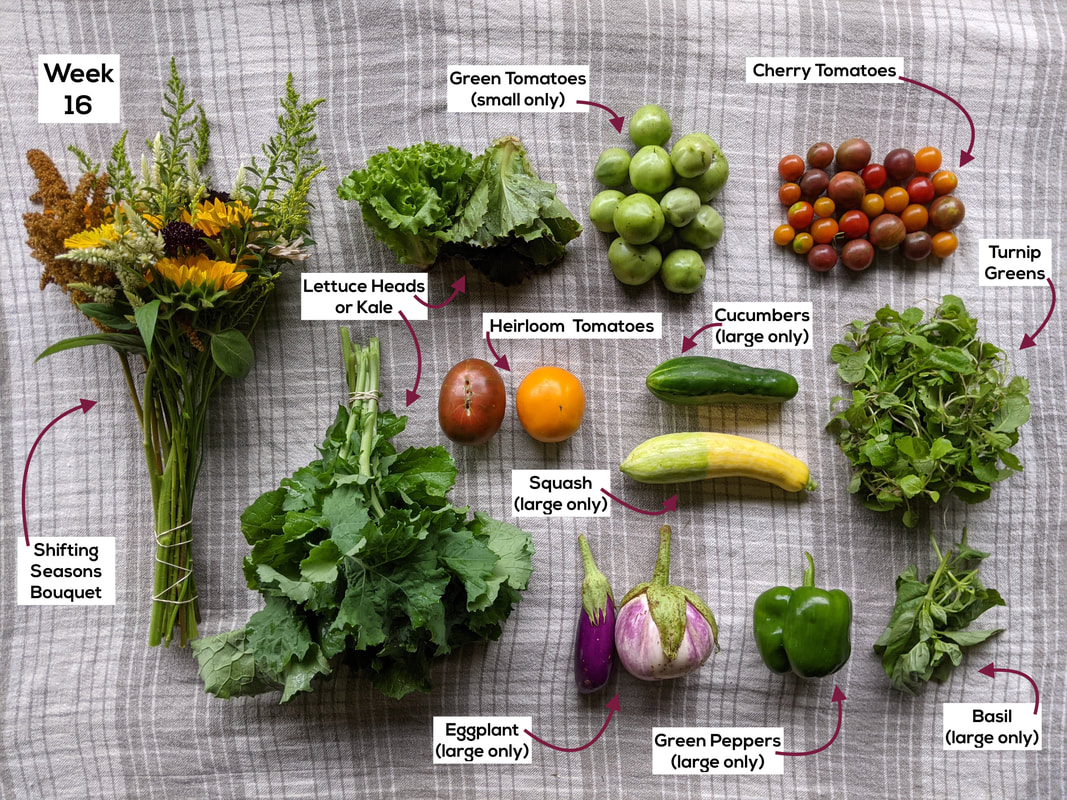 Charred Turnip Greens
https://fedandfit.com/charred-turnip-greens-lemon/ Ingredients: 2 cups Packed Turnip Greens 1 Whole Lemon 1 tablespoon Melted Bacon Fat {can sub with grass-fed butter or coconut oil} 1/4 teaspoon Kosher Salt 1/4 teaspoon Black Pepper Directions: Preheat oven to 400 degrees Fahrenheit and line a baking sheet with parchment paper. Cut lemon into thin slices and remove all seeds. Add greens, lemon slices, salt, pepper, and melted bacon fat into a large mixing bowl. Massage all the ingredients together with your hands until every lemon and green is thoroughly coated. Lay out on baking sheet in a thin, non-overlapping layer. Bake at 400 F for 15 minutes {more or less time depending on your oven}. Fried Green Tomatoes Real Simple Ingredients: 1/2 cup all-purpose flour 3 eggs, beaten 1/2 cup yellow cornmeal 1 pound green tomatoes, sliced 1/2 inch thick 1/2 cup canola or other neutral oil kosher salt Directions: Place the flour, eggs, and cornmeal in 3 separate shallow bowls. Dip the tomatoes first in the flour, then in the eggs (letting any excess drip off), and finally in the cornmeal, pressing gently to help it adhere. Heat the oil in a large skillet over medium-high heat. Working in batches, cook the tomatoes until golden, 1 to 2 minutes per side. Transfer to a paper towel–lined plate. Season with ½ teaspoon salt before serving. |
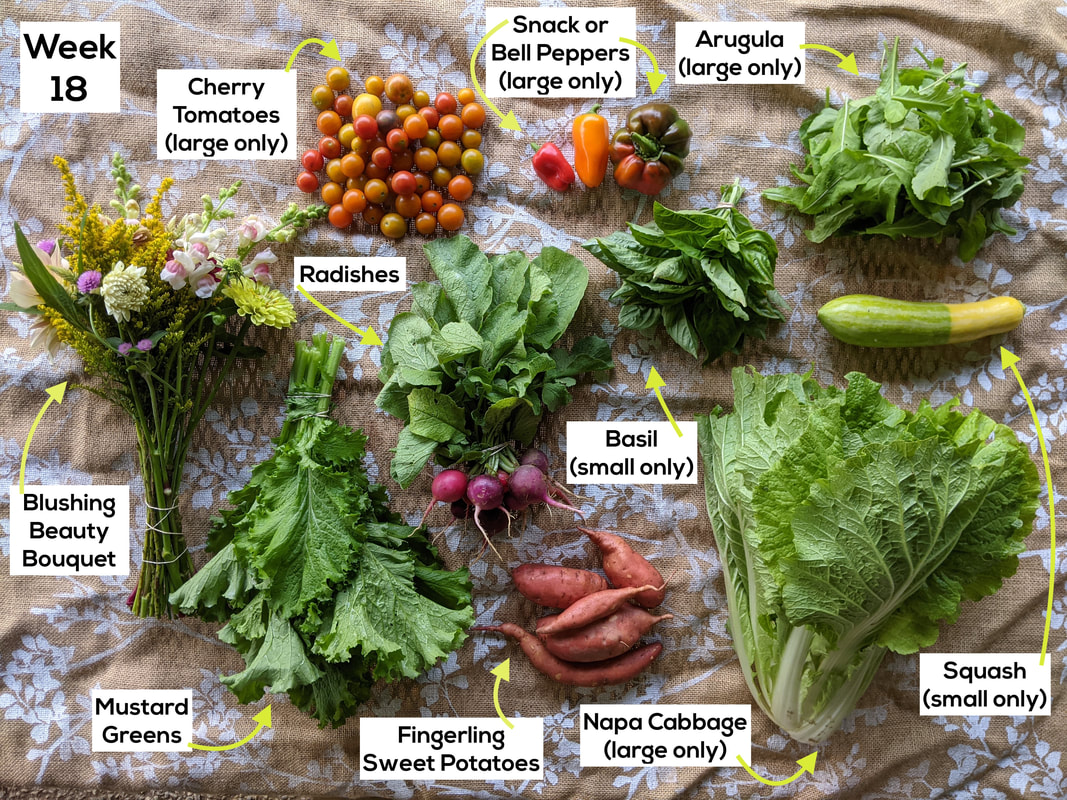
Crooked Fence Farm
We're all about love and leafy greens! So grateful for our CSA community! Archives
August 2022
Categories |
 RSS Feed